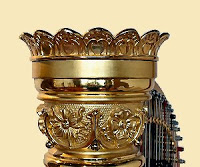
 Q: I have a Lyon and Healy 23 and I was given a gold crown for my birthday. I thought when I took off the wood crown that the gold crown would be an easy installation using the same holes for the screws. Guess I was wrong.
2. Have a chair or step-stool available so you can see the top of the column
3. Set the crown lightly on top of the column. Ideally, the screw holes should point to front, back, left and right, but you need to avoid being too close to existing screw holes. Rotate if necessary so you can drill into virgin wood.
4. Center crown as best you can, sighting from underneath at all angles
5. When you like the position of the crown, pull down firmly so that the double sided tape will hold it in place temporarily
6. Using a punch, nailset, or awl, mark holes as close to the exact center of each screw hole as possible
7. Pull the crown off the column. Using a screwdriver or other fairly solid, fairly sharp tool, scratch an “X” on its bottom nearest the front screw hole. I define “front” as the direction you would face if you were sitting at the harp. This marking will help you remember where the front of the crown is
8. Remove double-sided tape
9. Locate the correct size of drill. Determine this by holding the drill bit in front of a screw. The screw threading should be a little wider than the drill bit, but not much
10. Place a screw in the crown and note how much screw protrudes from the hole. This is the depth of hole you want to drill in the wood. Mark your drill bit with a piece of tape so that you don’t drill too deep
11. Drill your holes. Be careful to hold your drill as close to perpendicular to the wood as you possibly can. Slanted holes will pull the crown off center
12. Lubricate screw threads with beeswax or soap and place them in their holes
13. Remembering to keep the “X” in front, set your crown in place. Ideally, each screw will set right into its hole
14 Tighten screws. It is best to go around in a circle from screw to screw, tightening each a few turns at a time.
15. The screws shouldn’t feel loose. However, if you are fighting them, you need to stop. The heads will strip easily and the shafts can break. These screws are made of brass and are not terribly strong. If you have problems a little more lubrication may help. It is also possible your drill bit was too small, but be cautious about drilling a bigger hole. Look at the angles of the screws. If one or more are at a slant your holes probably got out of whack during drilling. If this is the case, it is best to start over, rotating the crown once again to avoid existing holes


or you could just use Super Glue. Kidding, I’m kidding!
Opinions oppressed in the comments are not necessarily those of the blog owner. 😉
Just what I was naughtily thinking!